Documentation for the following themes
Here You can find tutorials for Hybrid Themes.
Topics
How to install
Install the theme then the premium plugins
Short version: Install the free theme and activate it. For the premium version install the WPKoi Premium Functions and the Demo plugin if You have one and activate both as plugins with the free theme active! Read the detailed version below.
1. Install Your free theme
Go to Appearance » Themes menu in the admin. Click Add New button and search for Your selected WPKoi theme or upload the “themename”.zip. After the install process, activate the theme.
The free theme is required for the premium version also.
This is the install process for the following themes:
Here You can find all of the free WPKoi themes.
If You have some server compatibility issue, You can also install the theme via FTP. Read more about it here.
2. Activate the recommended plugins
The WPKoi themes work without the recommended plugins, but if You activate them, You’ll have more possibilities to build a great site. At the top of Your admin page, there will be a notification about the plugins or You can install them at Appearance » Install Plugins menu if You haven’t install them before.

WPKoi Templates for Elementor plugin is hardly recommended to be installed for the theme.
Installing the free version of the themes is that simple. If You want to use the premium features also, follow the next steps!
Do You want to import partitional demo with Your free theme? Try WPKoi Templates for Elementor plugin and follow this step by step tutorial.
install premium plugins
Install the free theme first, than install the purchased files as plugins.
3. Install the Premium plugins
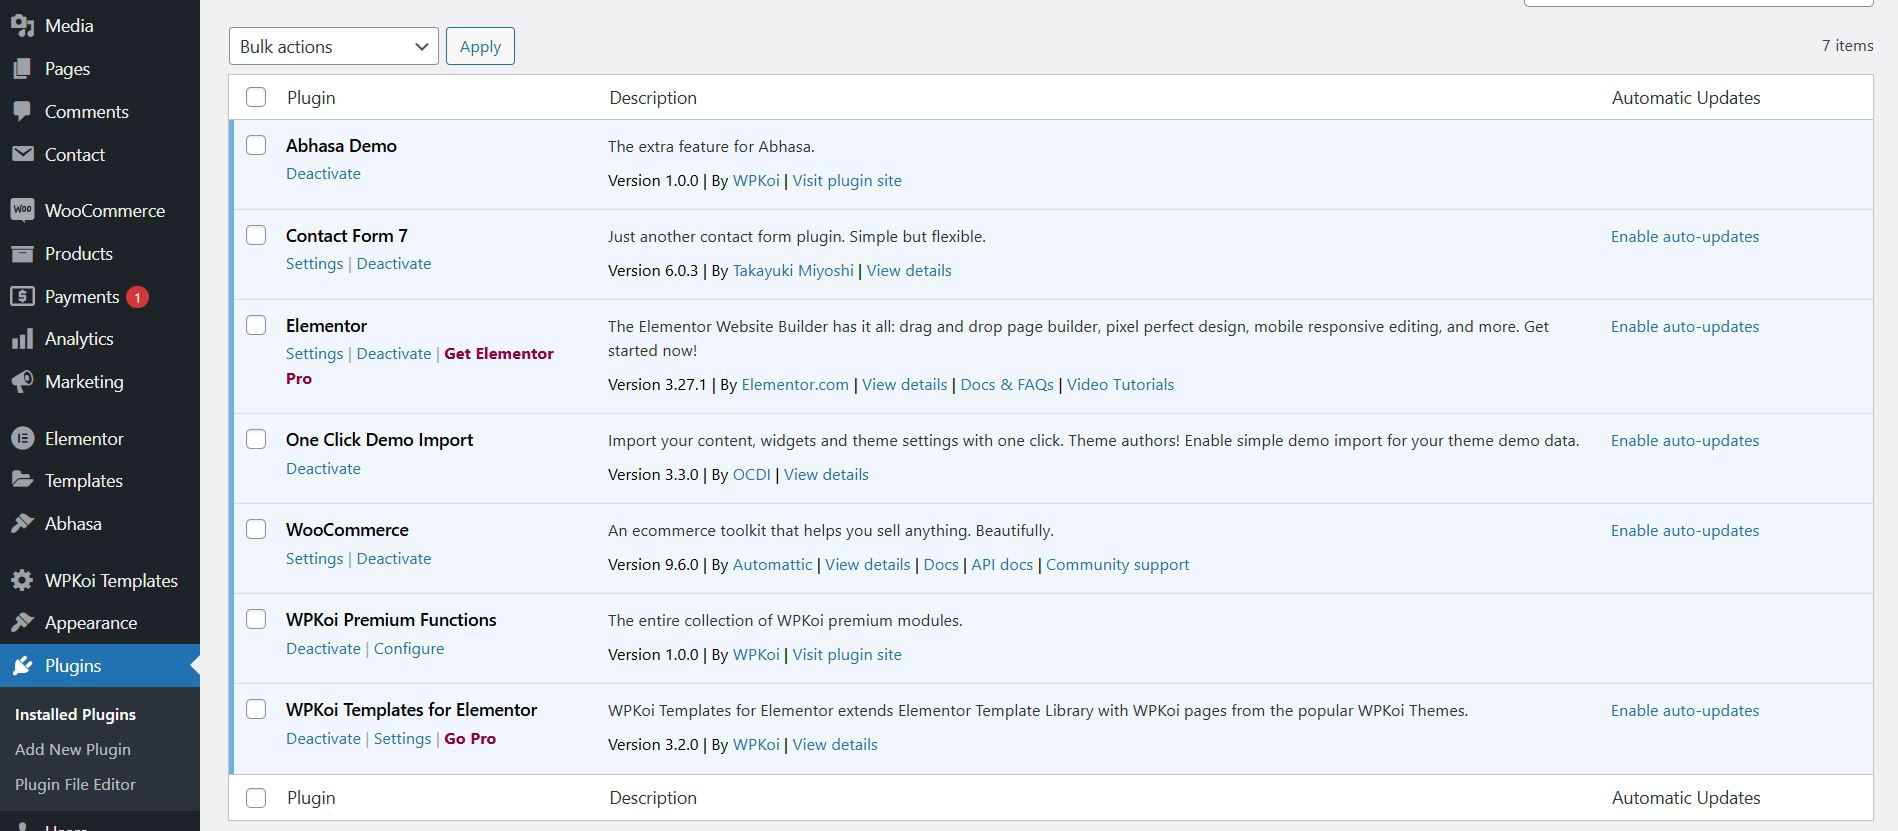
If You get a premium version for one of the WPKoi theme, You have to install it the purchased files as plugins with the free theme active. Go to Plugins » Add New menu in the admin. Click Upload Plugin button and upload WPKoi Premium Functions zip file and the Demo zip file if You have. After the install process, activate the plugins.
4. Install Demo Content (Premium feature)
If You want to import the content from the demo, You need to add One Click Demo Import plugin. You’ll see a notice in Your admin to install it or You can do this at Appearance-> Install Plugins menu.
After You installed the importer You’ll find a new admin menu at Appearance-> Import Demo Data. Here You can import the full demo.
It is important to install the necessery plugins before the import process! Add Elementor, WooCommerce and Contact Form 7 plugins to get the full demo!
If You get 404 errors after the import process at some pages go to Settings-> Permalinks and refresh the permalink structure.
5. Add License key
If You want to add Your license code, You can do that at the “Themename” menu in Your WordPress admin. You’ve got the license key in email when You purchased the product.
At wpkoi.com My account menu, You can reach the updates and license keys with Your purchase email anytime.
Import the Free,
Partial demo
The developers can’t add demo content to the free themes on wordpress.org, but You can import the partial homepage of the demos with plugins!
1. Preparation
Ensure you have installed and activated both the Elementor and WPKoi Templates for Elementor plugins. All features work with the free version of the Elementor Website Builder.
2. Import a Template
Go to WPKoi Templates admin menu and navigate to the Templates tab.
Find your favorite page template and click the IMPORT button. This will add the template to your Elementor Template Library and automatically create a new page with the imported content.
3. Editing the Content
Go to the Pages section in the WordPress admin menu to find the newly generated page.
If needed, adjust the page settings in the default page editor (e.g., set it to full-width, adjust margins, etc.).
Once the page settings are adjusted, use Elementor to edit the content and design as desired.
Import full Demo
(Premium feature)
Install the premium and recommended plugins to import.
If You want to import the content from the demo, You need to add One Click Demo Import plugin. You’ll see a notice in Your admin to install it or You can do this at Appearance-> Install Plugins menu.
After You installed the importer You’ll find a new admin menu at Appearance-> Import Demo Data. Here You can import the full demo.
It is important to install the necessery plugins before the import process! Add Elementor, WooCommerce and Contact Form 7 plugins to get the full demo!
If You get 404 errors after the import process at some pages go to Settings-> Permalinks and refresh the permalink structure.
Edit template parts
Access Template Parts via Theme admin menu -> Edit Template Parts or Appearance -> Patterns.
Edit top bar, blog, footer and other layouts with the block editor
In the WordPress themes with template parts You can edit the template parts in the block based site editor.
Go to Theme admin menu -> Edit Template Parts or Appearance -> Patterns admin menu and select the template part You want to edit.

Here You can edit the top bar, footer, blog and archive, single post and page, 404, search layouts.
If You want to learn more about the block based editor, You can find details at WPBeginner and WordPress.org.
With the premium version of the theme You can edit the colors and the typography in the customizer at Appearance-> Customize admin menu.
Customizer settings
Access the customizer at Appearance-> Customize menu.
Color settings
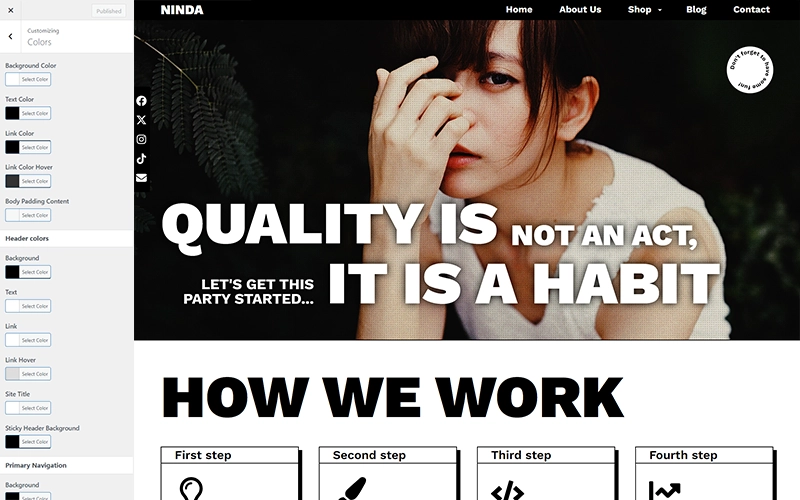
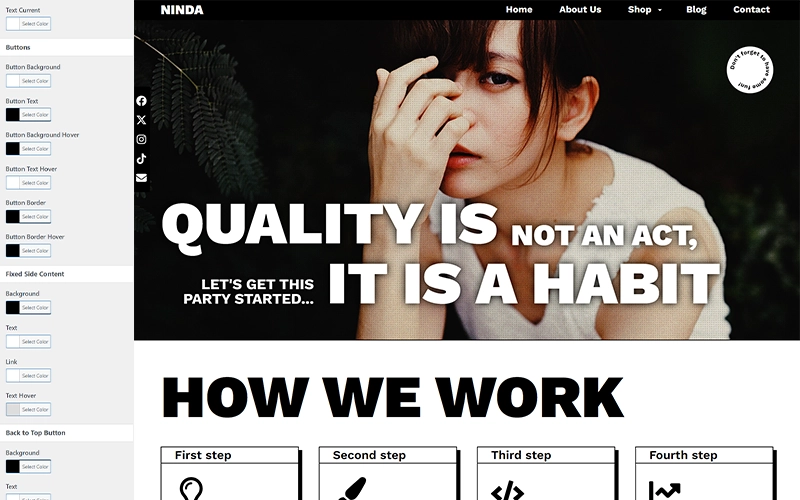
At the colors section You can edit the basic colors.
With the premium version You have additional color settings like colors for header, navigation, submenu, buttons, fixed side content, back to top button, forms, scrollbar etc.
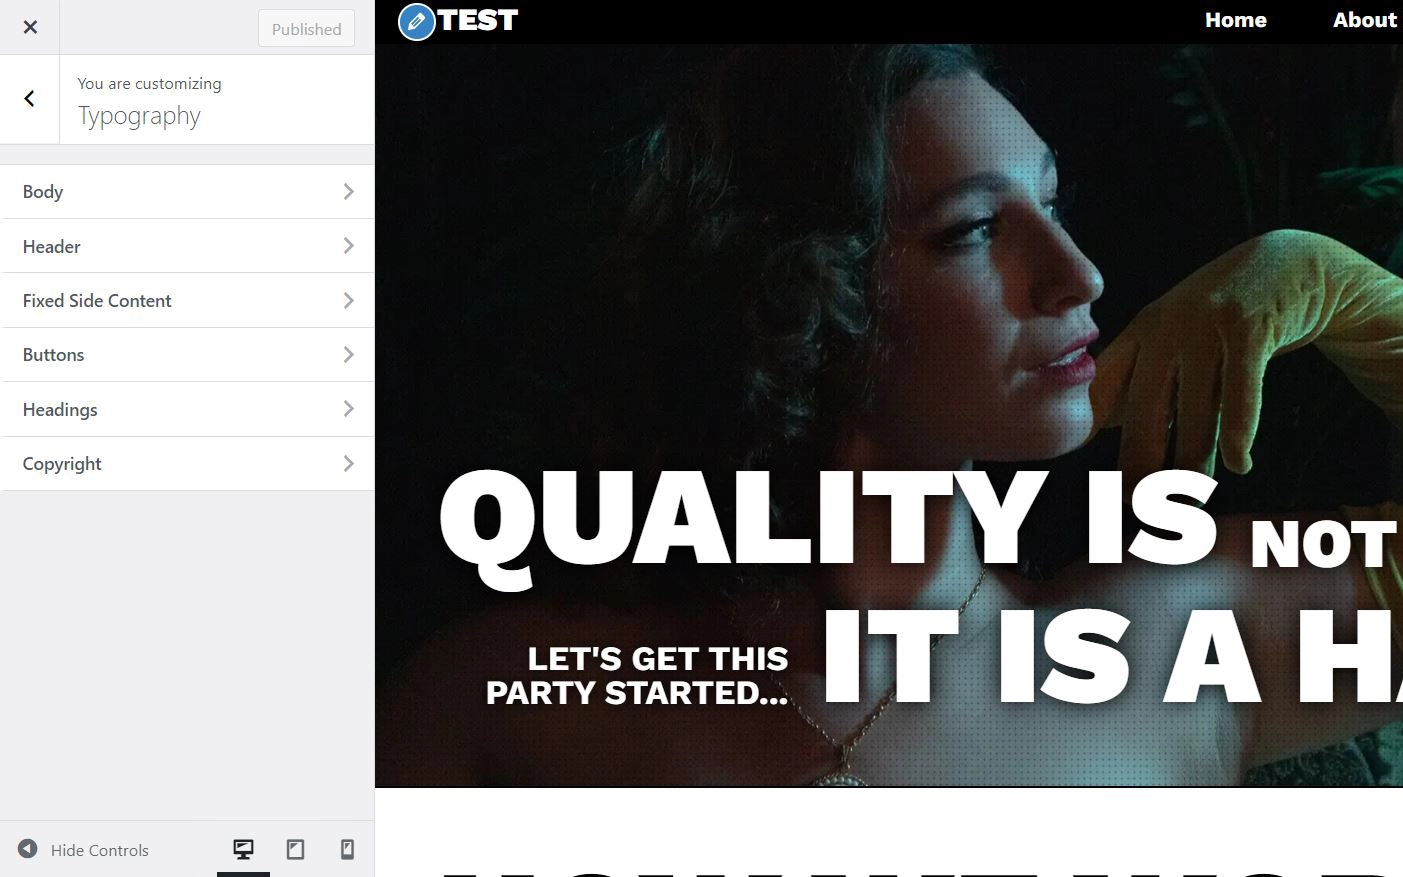
Typography settings (Preamium feature)
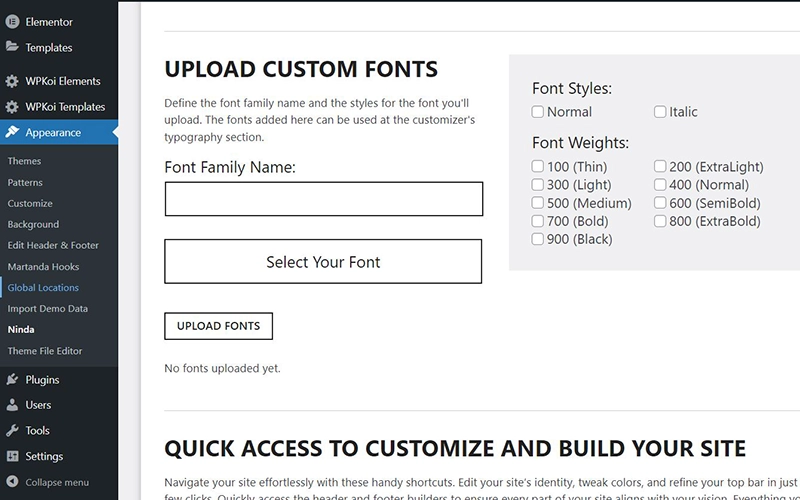
You can upload Your custom fonts at the theme’s dashboard under the Appearance admin menu.
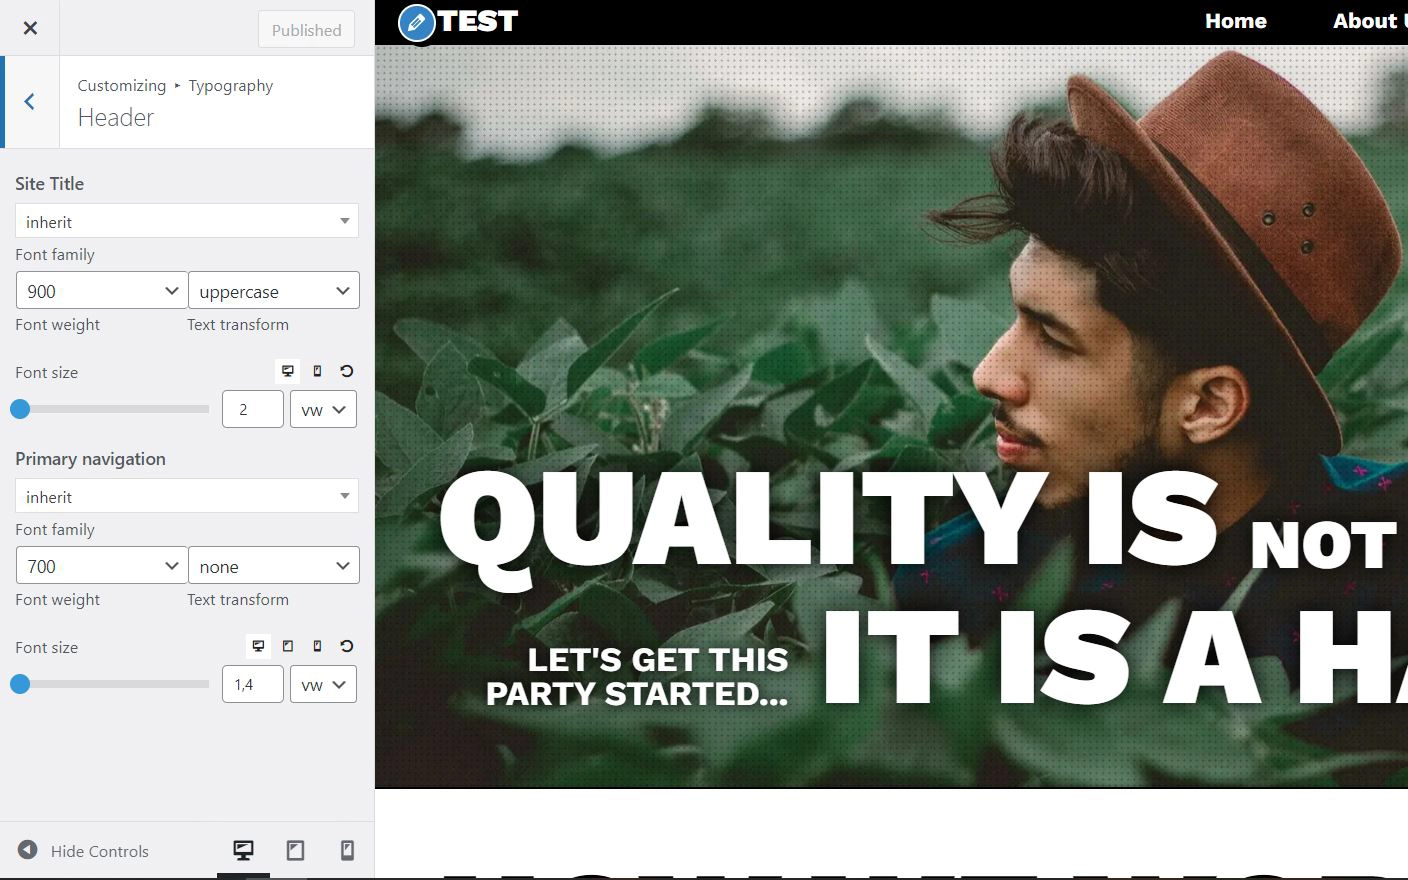
At the customizer’s Typography section You can edit the fonts for various elements. You can select from Your uploaded fonts and from different Google fonts. You can also edit the font size, weight etc.
Fixed side settings
You can fix short text content or social icons to the left side of Your website. You can use the following icons: Facebook, X, Instagram, Youtube, TikTok, Twitch, Tumblr, Pinterest, Linkedin and envelope for email.
With the premium version You can edit the typography, colors, spacings and You can add custom svg icons.
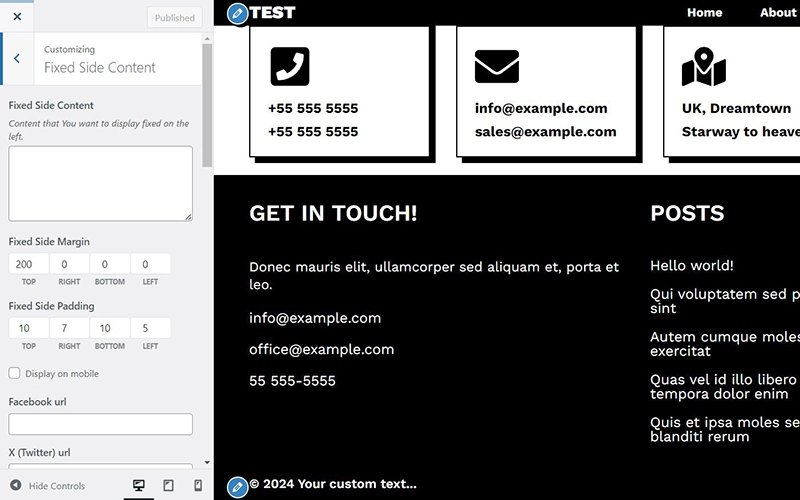
For example if You want to use the WordPress icon, add the following svg code to Your site:
<svg xmlns="http://www.w3.org/2000/svg" viewBox="0 0 512 512"><!--!Font Awesome Free 6.6.0 by @fontawesome - https://fontawesome.com License - https://fontawesome.com/license/free Copyright 2024 Fonticons, Inc.--><path d="M61.7 169.4l101.5 278C92.2 413 43.3 340.2 43.3 256c0-30.9 6.6-60.1 18.4-86.6zm337.9 75.9c0-26.3-9.4-44.5-17.5-58.7-10.8-17.5-20.9-32.4-20.9-49.9 0-19.6 14.8-37.8 35.7-37.8 .9 0 1.8 .1 2.8 .2-37.9-34.7-88.3-55.9-143.7-55.9-74.3 0-139.7 38.1-177.8 95.9 5 .2 9.7 .3 13.7 .3 22.2 0 56.7-2.7 56.7-2.7 11.5-.7 12.8 16.2 1.4 17.5 0 0-11.5 1.3-24.3 2l77.5 230.4L249.8 247l-33.1-90.8c-11.5-.7-22.3-2-22.3-2-11.5-.7-10.1-18.2 1.3-17.5 0 0 35.1 2.7 56 2.7 22.2 0 56.7-2.7 56.7-2.7 11.5-.7 12.8 16.2 1.4 17.5 0 0-11.5 1.3-24.3 2l76.9 228.7 21.2-70.9c9-29.4 16-50.5 16-68.7zm-139.9 29.3l-63.8 185.5c19.1 5.6 39.2 8.7 60.1 8.7 24.8 0 48.5-4.3 70.6-12.1-.6-.9-1.1-1.9-1.5-2.9l-65.4-179.2zm183-120.7c.9 6.8 1.4 14 1.4 21.9 0 21.6-4 45.8-16.2 76.2l-65 187.9C426.2 403 468.7 334.5 468.7 256c0-37-9.4-71.8-26-102.1zM504 256c0 136.8-111.3 248-248 248C119.2 504 8 392.7 8 256 8 119.2 119.2 8 256 8c136.7 0 248 111.2 248 248zm-11.4 0c0-130.5-106.2-236.6-236.6-236.6C125.5 19.4 19.4 125.5 19.4 256S125.6 492.6 256 492.6c130.5 0 236.6-106.1 236.6-236.6z"/></svg>
Edit copyright text (Preamium features)
You can change the copyright text with the premium versions also at the customizers General section. With the free themes, You can hide it with some additional CSS code.

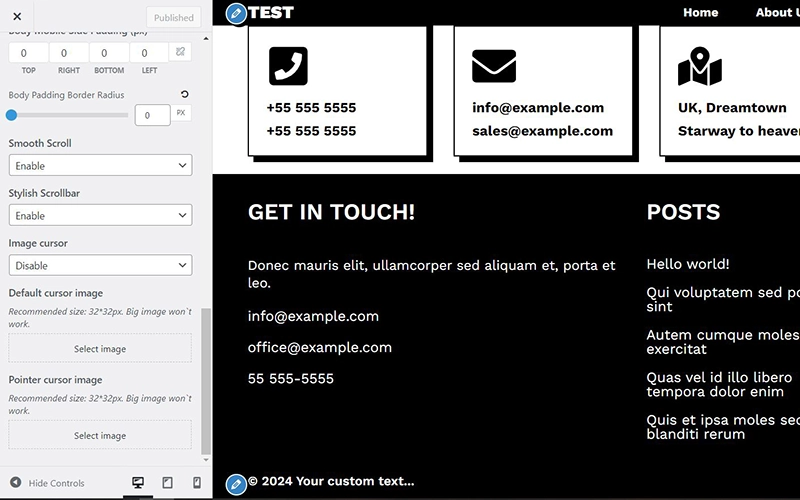
Additional settings (Preamium features)
There are some additional settings in the customizer.
You can add sticky header, custom cursor, stylish scrollbar, smooth scroll etc.
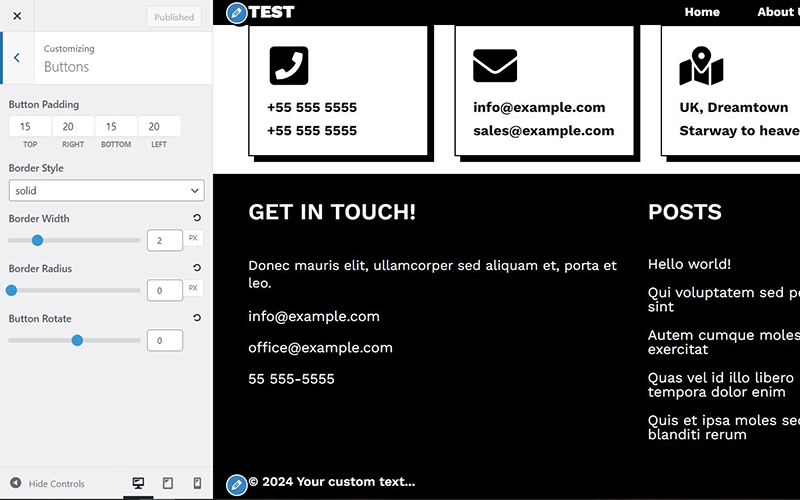
There are also some additional settings for buttons, spacings etc.
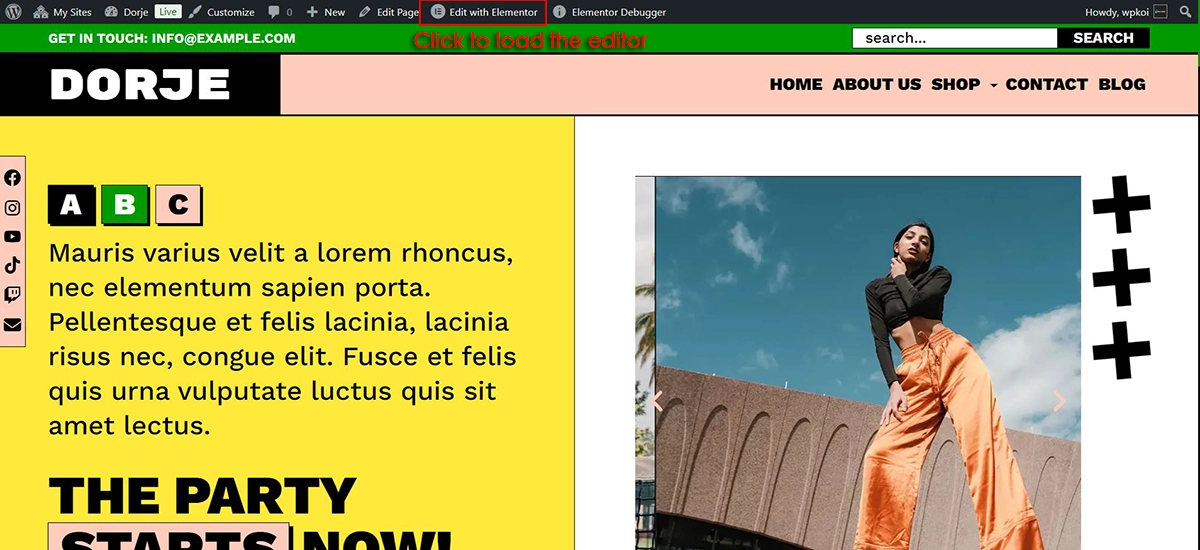
Edit pages with Elementor
Navigate to Pages -> All Pages. Select the page you want to edit and click Edit with Elementor. Use the Elementor editor to customize your layout, add widgets, and style your content.
You can edit the pages and posts with Elementor, but basically You can’t edit the blog or archive pages! They have different structure. However Elementor Pro or another third party plugin could solve this too. Or You can build a simple page with Elementor and use that as blog page.
With WPKoi themes You can edit the blog or archive pages with the block editor.
If you’re unsure how to use Elementor, visit their help center for detailed guides.
Page and post options
Extra settings for pages and posts in the default editor
To edit Your pages go to Pages, to edit Your posts go to Posts in Your admin.
WPKoi themes has some extra option features to Your posts and pages.
1. Disable elements
2. Transparent header
If You add a big image or slider to the top of Your page, sometimes it looks nice, if Your header is above the image.
In this case You have to setup the transparent header here.
Edit the single page and post template parts
In the new generation WordPress themes You can edit the template parts in the block based site editor.
Go to Theme admin menu -> Edit Template Parts admin menu and select the template part You want to edit.
If You want to learn more about the block based editor, You can find details at WPBeginner and WordPress.org.

Global locations (Premium feature)
Add Elementor templates to different locations
Take advantage of Elementor’s global features by creating templates that can be used throughout your site.
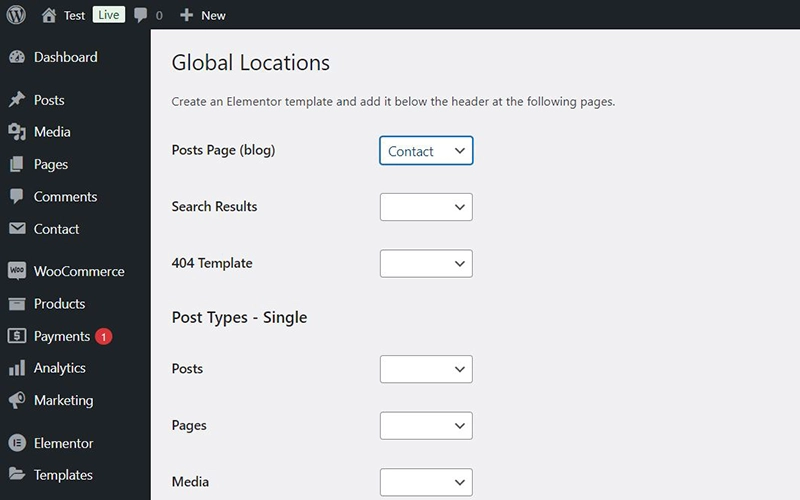
Go to Theme admin menu -> Global Locations admin menu and insert custom templates in strategic global locations, such as directly below the header, to enhance your site’s consistency and functionality.
This feature brings incredible flexibility to your site’s layout.
Hooks (Premium feature)
Add custom codes at Theme admin menu -> WPKoi Hooks
The premium version has an extra hooks feature for developer at Theme admin menu -> WPKoi Hooks. You can add Your custom HTML, script or PHP to a lot of places without modify the template files.
You can add content to wp_head, wp_footer, before and after header etc…

Frequently Asked Questions
No, all WPKoi themes and plugins work perfectly with the free version of Elementor. You can access all features without needing Elementor Pro. However, Elementor Pro offers additional functionalities that you may find useful. You can purchase it separately from Elementor’s website.
If you see the message:
The package could not be installed. The theme is missing the style.css stylesheet.
This usually happens because WPKoi premium versions are plugins, not themes. They should be installed as a plugin while keeping the free theme active.
If you’re installing a premium version, please follow the step-by-step guide on this page.
Finding elements on a complex webpage can sometimes be tricky. To locate an image:
Open Structure to access the Navigator panel.
The Navigator shows the page’s structure in a tree view, allowing you to easily find and select any element.
You can also rearrange elements by dragging and dropping them in the Navigator.
You can download the free theme from the theme’s landing page. Browse the themes at Themes-> All WPKoi Themes.
You can also download all WPKoi themes directly in Your WordPress admin from wordpress.org or from the wordpress.org website.
This happens because Safari automatically unzips downloaded files.
To fix this:
Change Safari’s settings to prevent automatic unzipping.
Alternatively, download the file using a different browser (e.g., Chrome or Firefox).
Yes! All WPKoi themes and plugins are licensed under the GPL (General Public License). This means you can use them on unlimited websites without restrictions.
Yes! WPKoi themes are fully compatible with WooCommerce, allowing you to create a seamless online store. The premium version includes additional WooCommerce features for enhanced functionality.
Docs Menu
FAQ
External documentations and tutorials


